Very simple, all you need is food coloring, a few small bottles of glue, wax paper, some googly eyes, and any other decorative stuff you want (like glitter).
Lay the wax paper on a FLAT surface. Reason I specify? Oh..Well....I put mine on a kind of warped cookie sheet and my first ghost turned into a white puddle. Oops. Now, if you want nicer looking cling-ons, print out pictures of whatever you want. Place the wax paper on top of the picture, so you can follow the outline if you would prefer do this.
For ghosts, you just need to use the plain white glue. First make the outline of whatever shape you want (or trace the outline of the picture). Then fill in the outline with the glue. Make sure it is about 1/8" to 1/16" deep. Give it a few minutes to settle and then decorate with googly eyes or glitter or whatever you want. You can even use a different color glue and make drops for eyes if you want.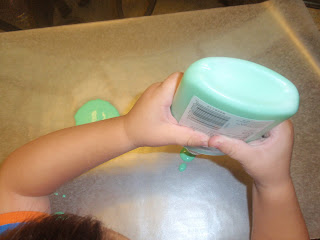 Oh my sweet little punkin' head. I remember the days of these chunky hands!
 Oh my sweet little punkin' head. I remember the days of these chunky hands!
For other objects, like pumpkins, use the food coloring to color the glue. (this is why I suggest little bottles of glue. You can simply drop in the bottle and shake, or you can squeeze out into a disposable cup, mix and then pour back in bottle). Follow the same directions as above.

Let the glue sit for at least overnight. We did ours at about seven pm last night, and at ten this morning, most were still kind of wet. My son's favorite "goblin" was done though, so I got a good picture of that for you. I recommend doing the activity somewhere where you don't have to try and move the wax paper. When they are dry, simply peel the shape off of the wax paper and push on the window. If they don't stick easily, just lightly dampen the back and it will stick. If you want to save them for next year, just store them in between some more wax paper!
HINT: If you want to make a shape with two colors, like an orange pumpkin with a green stem, let one color dry the majority of the way first, otherwise the colors will spread into one another, as you can see with our pumpkins.
My son's favorite part of this activity was being able to do it himself. He wanted to make green goblins, which was great. And of course, being 2 and SOOOOO independent, he wanted to "Do it MYself!". So he did. And he decorated them himself.


This is the goblin my son did all by himself!!